N64Digital Rescue Instructions
About:
The rescue system is a use in case of emergency where the system is unable to boot the normal firmware. Typical reasons could be caused from a lose of power during the normal flashing procedure. If you have installation problems that create a no video/audio sitution doing these steps will not resolve those issues.
You will need to use a device that has WIFI capabilities to upload the firmware. A laptop or desktop with built in WIFI is the best option but you can also use Android and Apple phones. Make sure these devices are on the latest IOS/Android versions
Downloading the latest firmware
Download n64digital-update.fx to the device that has WIFI capabilities.
Entering Rescue Mode
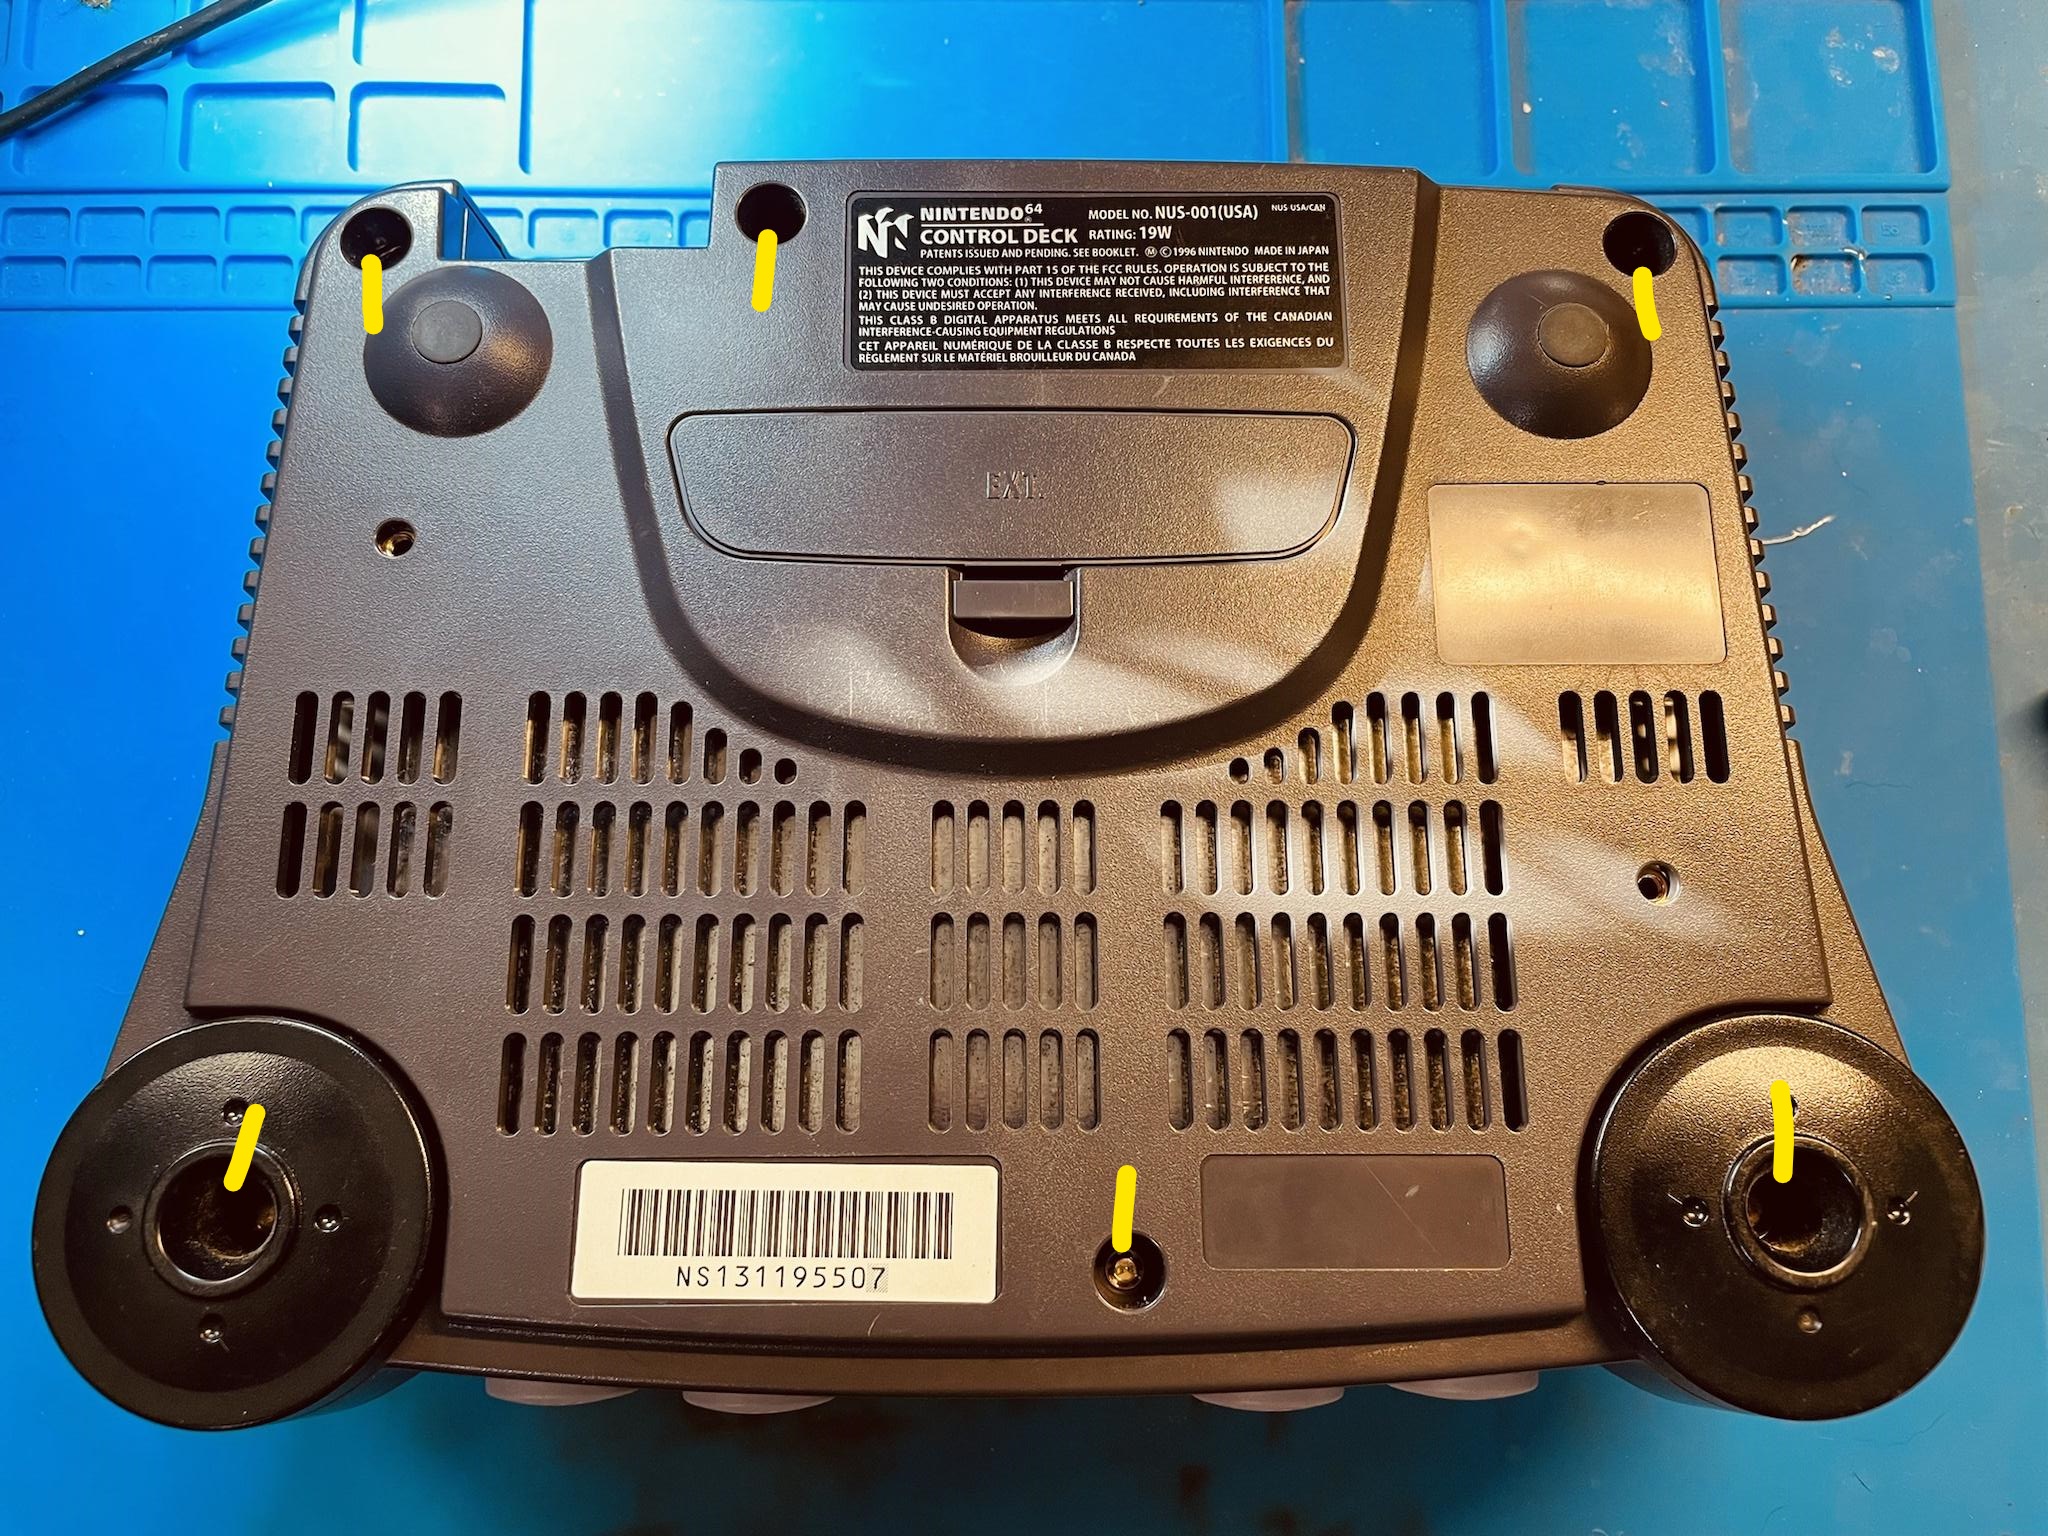
You will need to remove the top case of the console. the case is held in by 6 4.5mm gamebit screws
Once removed re-insert the power brick. It is not necessary to connect anything else. The game cart, jumper pak, controller and hdmi cable can all be left unplugged.
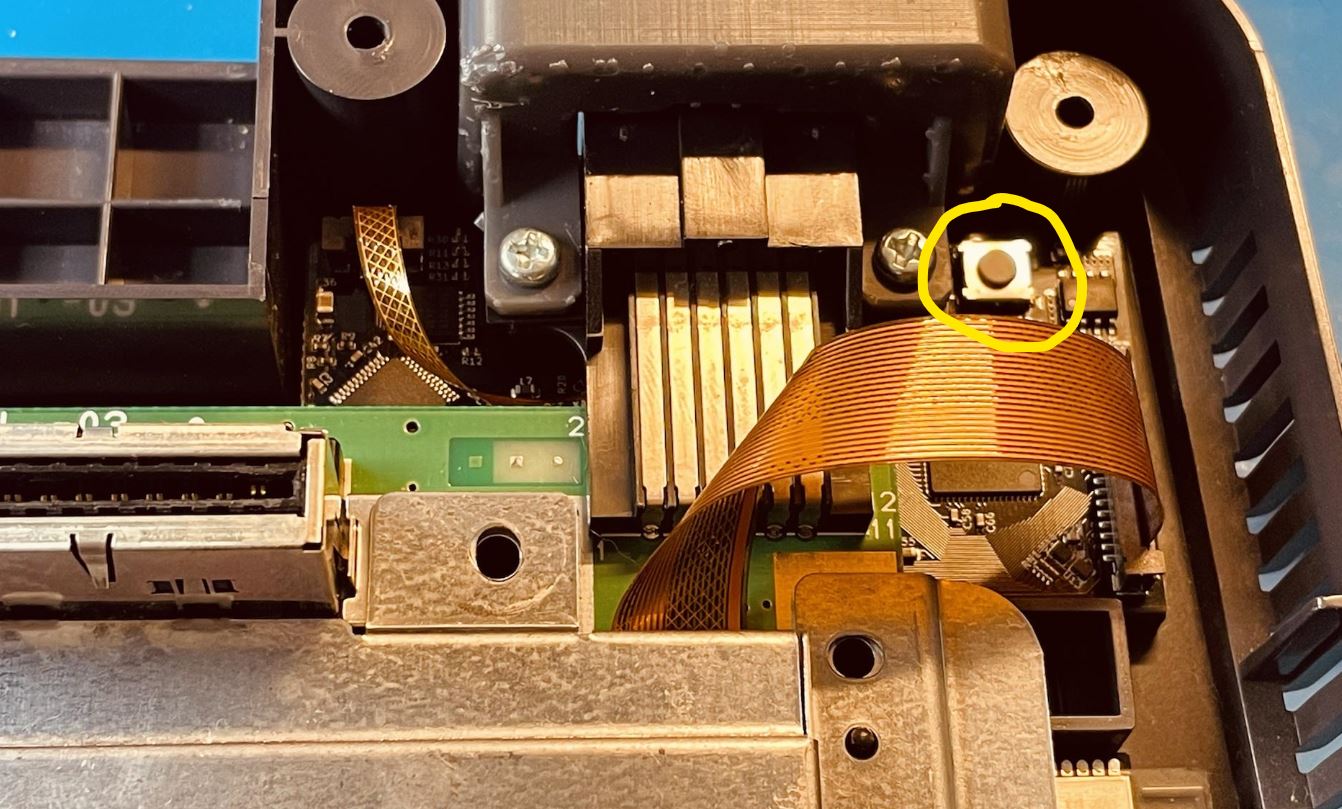
Turn on the console while holding down the N64Digitals button. After power on release the button. This will put the N64Digital in rescue mode.
In Rescue mode the N64Digital will not output any HDMI video
If successfully in rescue mode you will see a broadcasted access point with the name: Rescue-System
Connect to the access point using the case sensitive password "Rescue-System"
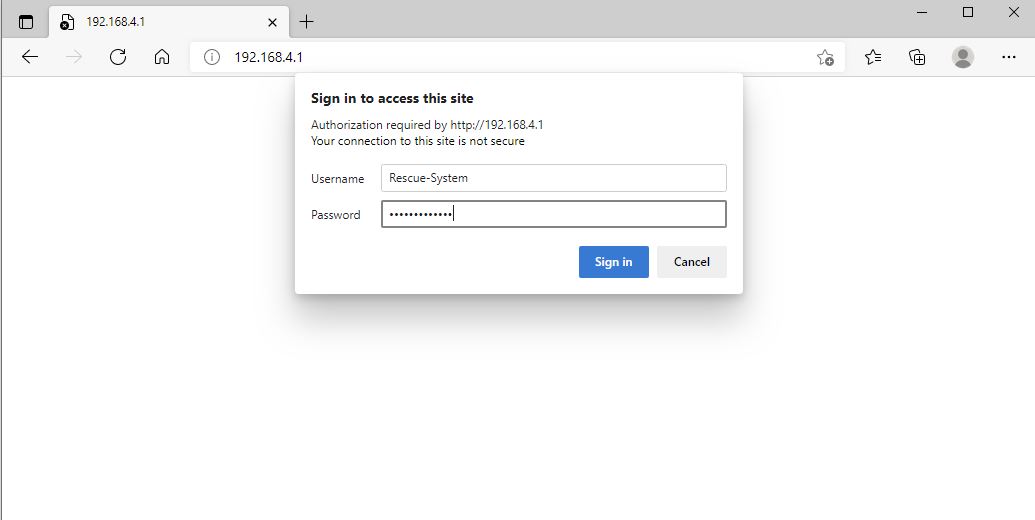
Once connected open up a web browser (Safari, Chrome, FireFox, Edge) and go to the URL http://192.168.4.1
Enter the case sensitive username "Rescue-System" and case sensitive password "Rescue-System"
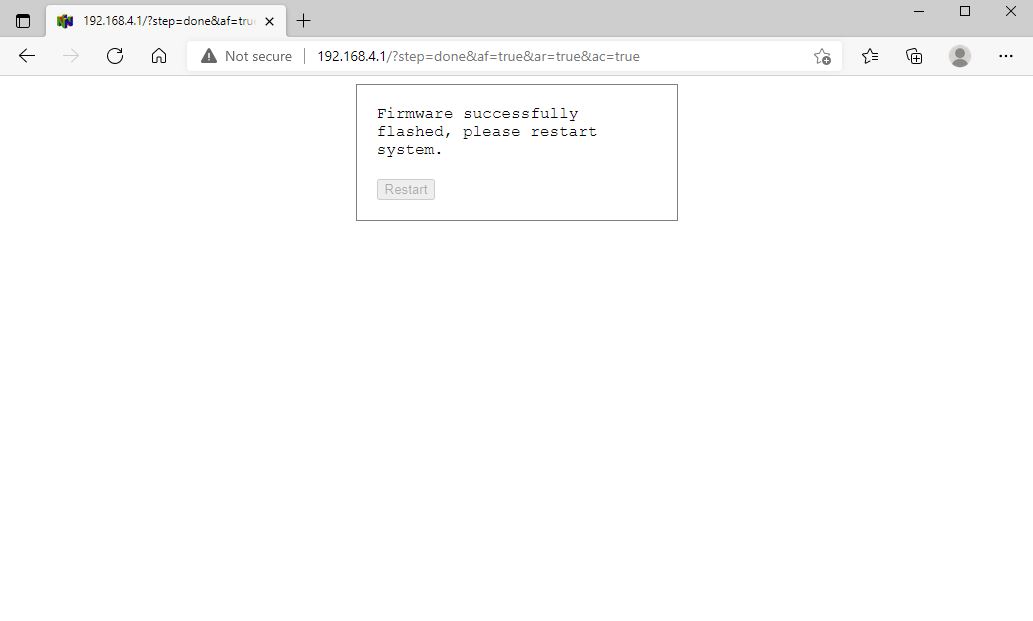
Select the n64digital-update.fx file you downloaded earlier and hit the upload button. Leave reformat NVS unchecked. This process is automatic and can take up 5 mins to complete. Once complete you will have a success message.
Power off the console reinstall the top case. Insert a game cart, jumper pak, controller and mini HDMI cable. Power on the console and the unit will be back to normal.